The Tree Top Walk
The Basic Idea
In an area with a row or quite a few trees get your group to walk slowly under the trees while holding a CD or mirror flat at the end of their nose so they can look straight up in to the canopy and feel like they are walking through it.
This activity is most interesting when leaves are on the trees but can also be good to explore the structure of bare trees in the winter.
Age group and duration
Work with any age and can take from 10 - 20mins.
Resources you will need
Old CD's (ones that you have recorded onto will not work) or mirrors.
The Detail
Find a good space with lots of trees – a row of trees along an edge of a field can work well. In advance of the activity walk the route yourself with a mirror. Make sure the ground is fairly level and free of trip hazards and that it goes under lots of trees with ideally both low (although not in your face) and high branches as this gives the best effect.
Talk with the group about how to walk safely and slowly - space the group out and keep an eye on them so they do not bump into each other. Also it is great if the group can stay quiet as you may see birds in the tree tops and will be able to focus more on what you are seeing.
Tell the group to put the CD or mirror on the tip of their nose – not under it as it will fog up – then angle it so they can just see their hair and then level off so this is just out of view and now they are looking directly up. Tell the group to stay looking in the mirror as much as they can as the feeling of being in the tops of the trees will grow. Slowly lead the group on their tree top walk.
On finishing come together in a circle to share experiences and explore what the group saw and how it felt. Discuss the different shapes of leaves and colours that the group saw.
How to take it even further or make it more challenging
You can ask the group if they can be quiet to look for birds in the trees if there are any about.
If the leaves are on the trees get the group to look for holes in the leaves. Following the activity you can then discuss what has made the holes and which insects might live and feed on different trees. You can then also discuss what might feed on these insects and explore food chains on trees.
Stick Towers and Shapes
The Basic Idea
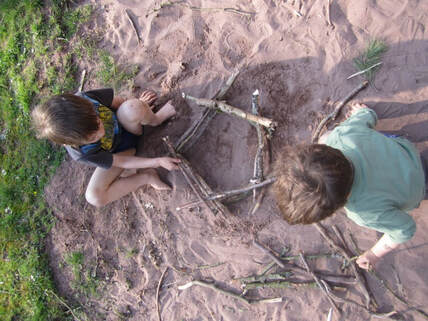
Get your group to work in pairs to collect a pile of sticks – 10 – 20 sticks per group is ideal. Get them to create a tower using a given shape. Explore using different shapes and discuss which were more challenging in terms of stability.
Age group and duration
Work with any age and can take 20 - 30 mins or more.
Resources you will need
A pile of fairly straight sticks - these can be reused for other activities if you store them somewhere dry.
The Detail
If you are in your school grounds then gather together or bring in a good pile of sticks – you may need 300 for a whole class to make this work well.
If in a space with a lot of fallen sticks send the group off in pairs to collect 20 sticks – give them some guidance about how far they can go and show them some examples of the size of stick to collect and that they should not be broken off trees – longer sticks on the ground are fine as they can break these up – but sticks that are too thick or heavy will not work so well.
If you have the time work through 3, 4 and 5 sided towers – although you will need more sticks for higher sided towers – you can bring groups together in to larger group sizes to create these.
Tour the different towers that have been made and discuss how this went and what was challenging.
How to take it even further or make it more challenging
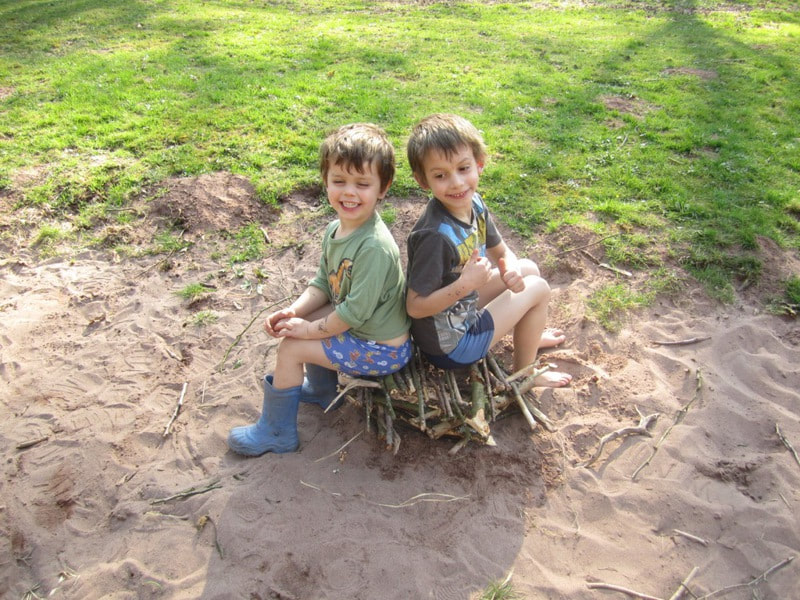
With a few more sticks you can get your groups to test the strength of their towers by putting sticks across the top and sitting down on it.
Take it turns to see which group can build the tallest tower the quickest without it falling down.
When towers do fall down turn your pile in to a giant game of pick up sticks.
The Basic Idea
Get your group to work in pairs to collect a pile of sticks – 10 – 20 sticks per group is ideal. Get them to create a tower using a given shape. Explore using different shapes and discuss which were more challenging in terms of stability.
Age group and duration
Work with any age and can take 20 - 30 mins or more.
Resources you will need
A pile of fairly straight sticks - these can be reused for other activities if you store them somewhere dry.
The Detail
If you are in your school grounds then gather together or bring in a good pile of sticks – you may need 300 for a whole class to make this work well.
If in a space with a lot of fallen sticks send the group off in pairs to collect 20 sticks – give them some guidance about how far they can go and show them some examples of the size of stick to collect and that they should not be broken off trees – longer sticks on the ground are fine as they can break these up – but sticks that are too thick or heavy will not work so well.
If you have the time work through 3, 4 and 5 sided towers – although you will need more sticks for higher sided towers – you can bring groups together in to larger group sizes to create these.
Tour the different towers that have been made and discuss how this went and what was challenging.
How to take it even further or make it more challenging
With a few more sticks you can get your groups to test the strength of their towers by putting sticks across the top and sitting down on it.
Take it turns to see which group can build the tallest tower the quickest without it falling down.
When towers do fall down turn your pile in to a giant game of pick up sticks.
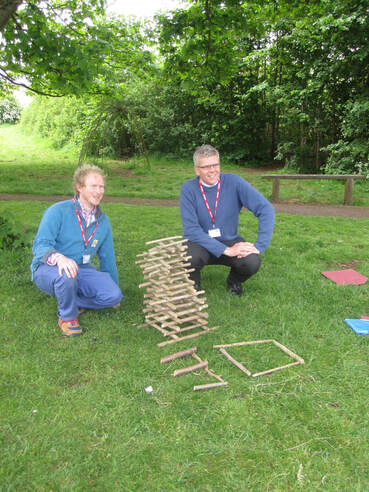
stick tower on Inset training
|
|
Natures Orchestra / Sound Mapping
The Basic Idea
A great activity for encouraging quiet and reflective time in nature.
Take your group outside into a natural space and get them to sit and quietly listen to sounds and if taking this further then write these down or draw them. Get everyone to discuss what they heard.
Age group and duration
Works with any age and can take 10 - 15 mins or more.
Resources you will need
Paper and pencil.
The Detail
Lead your group in to a natural space that is not dominated by loud human made sounds.
Discuss with the group that they will need to sit separately and quietly and focus on the different range of sounds and maybe count the number of sounds they can hear. With younger or fidgety groups it will be worth being directive in getting individuals to sit apart in a special spot where they can not interact with each other. Younger groups can hold up a fingers to count new sounds they have heard.
On a signal from you they can start listening for at least a few minutes in silence. This can be pushed to a longer period with calm groups or when groups have done this before.
On a final signal get everyone to come back and sit in a circle and individually go round to get feedback from each person. Discuss the balance of natural and human made sounds and why this is so for the space you are in.
How to take it even further or make it more challenging
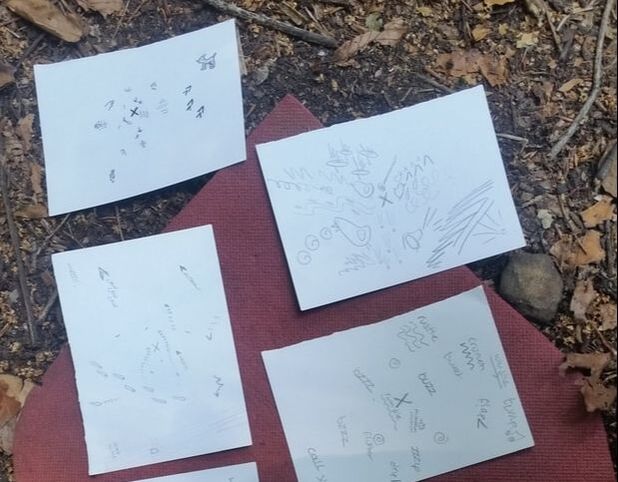
Sound Mapping - Give your group paper and a pencil and ask them to draw an x in the middle of the piece of paper. This represents where they are sat.
When sitting and listening ask them to draw or write the sounds they hear in the location and direction compared to where they are sat.
Either show them examples or discuss that they can draw a picture of a bird to represent bird song or a wavy, spiky or similar line to represent it.
The Basic Idea
A great activity for encouraging quiet and reflective time in nature.
Take your group outside into a natural space and get them to sit and quietly listen to sounds and if taking this further then write these down or draw them. Get everyone to discuss what they heard.
Age group and duration
Works with any age and can take 10 - 15 mins or more.
Resources you will need
Paper and pencil.
The Detail
Lead your group in to a natural space that is not dominated by loud human made sounds.
Discuss with the group that they will need to sit separately and quietly and focus on the different range of sounds and maybe count the number of sounds they can hear. With younger or fidgety groups it will be worth being directive in getting individuals to sit apart in a special spot where they can not interact with each other. Younger groups can hold up a fingers to count new sounds they have heard.
On a signal from you they can start listening for at least a few minutes in silence. This can be pushed to a longer period with calm groups or when groups have done this before.
On a final signal get everyone to come back and sit in a circle and individually go round to get feedback from each person. Discuss the balance of natural and human made sounds and why this is so for the space you are in.
How to take it even further or make it more challenging
Sound Mapping - Give your group paper and a pencil and ask them to draw an x in the middle of the piece of paper. This represents where they are sat.
When sitting and listening ask them to draw or write the sounds they hear in the location and direction compared to where they are sat.
Either show them examples or discuss that they can draw a picture of a bird to represent bird song or a wavy, spiky or similar line to represent it.
|
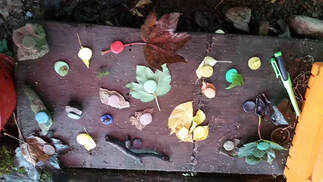
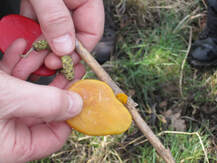
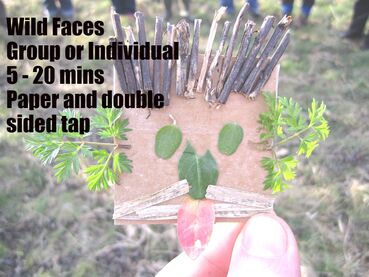
Rainbow Chips / Nature's Palette / Wild Faces The Basic Idea This is a great activity to ground a group in the space they are in and really take notice of what they can see and find. Your group will explore a natural space space and match or collect a range of tiny samples of natural colours they can find. Age group and duration Works with any age and can take 10 - 15 mins or more. Resources you will need Some colour chips - make your own from fimo, paint some stones/wooden discs or cut up paint charts. Have more than the number in your group and a good range of colours from across the rainbow. A small cloth bag. Small Pieces of card 5cm square with double-sided sticky tape on them. The Detail Set the scene with the group by challenging them to think about how many different types of colour might be found in the space they are in. Is there just one type of green? In your special bag you have some of the colours of the rainbow and you want them to take one without looking and then to explore the space to find an exact match. If it is loose on the ground and not attached to anything they can bring it back or if growing when they find it they can call you or someone else over to see if you think it is a good match. Challenge them to be strict with themselves and get a really good match. Repeat this for a few colours for each member of the group - get them to choose a new colour from the bag before they put their old colour back in. If they have collected matching natural objects from the ground you can lay these out with their colour chips until you have a nice range of colours displayed on the ground. Once everyone has had a good time exploring and finding call them back in and collect in remaining colour chips. Ask the group to share what colours they found and where and if some were really hard - have a look at what people found. How to take it even further or make it more challenging Hand out small cards with double sided tape on. Have a discussion at the start about mainly picking natural objects that have fallen on the ground and are not growing. If picking from live plants or trees only take a tiny sample so as not to damage them. Leaders should guide the group appropriately if there are poisonous plants or fungi in the area. Anything wet will not stick – so best not done on a rainy day.
|